Single User Creation in Microsoft 365 Admin Portal
11/17/20242 min read
Add users and assign licenses at the same time
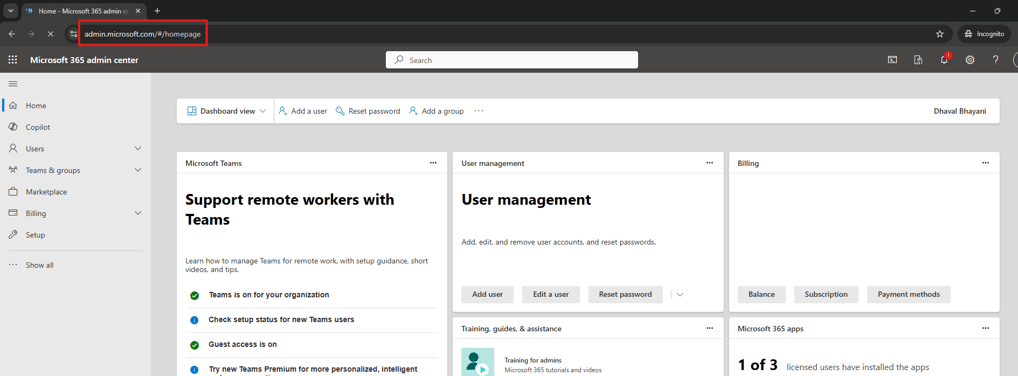
Go to the Microsoft 365 admin center at https://admin.cloud.microsoft.
Hello and welcome! I'm Dhaval Bhayani from Cloud Prospect. Today, I'll guide you through the process of creating and managing new users in Office 365 to boost your team's collaboration.
Adding new users in Office 365 is crucial for administrators and business owners. It enables you to onboard new employees, contractors, and partners, providing them with the necessary access to perform their tasks efficiently.
In this tutorial, we'll walk you through the steps to quickly and easily create new users in Office 365. We'll also highlight important considerations, such as assigning appropriate roles and licenses.
Introduction
How to create an user in Office 365

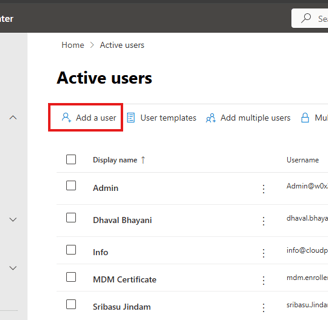
Go to Users > Active users, and select Add a user.

In the Set up the basics pane, fill in the basic user information, and then select Next.
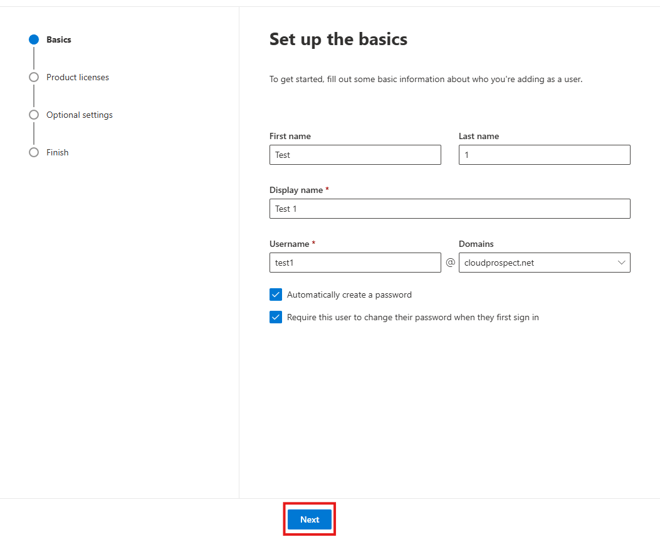

Name Fill in the first and last name, display name, and username.
Domain Choose the domain for the user's account. For example, if the user's username is Jakob, and the domain is contoso.com, they'll sign in by using jakob@contoso.com.
Password settings Choose to use the autogenerated password or to create your strong password for the user.
The user must change their password after 90 days. Or you can choose to Require this user to change their password when they first sign in.
Choose whether you want to send the password in an email when the user is added.
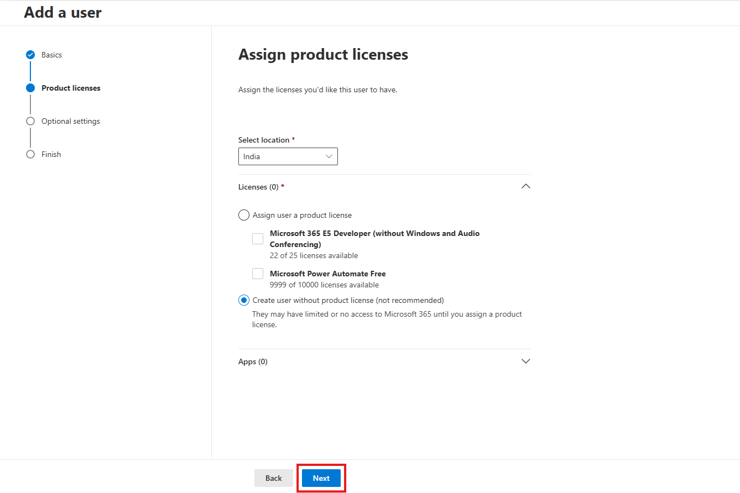
In the Assign product licenses pane, select the location and the appropriate license for the user. If you don't have any licenses available, you can still add a user and buy additional licenses. Expand Apps and select or deselect apps to limit the apps the user has a license for. Select Next.

In the Optional settings pane, expand Roles to make this user an admin. Expand Profile info to add additional information about the user.
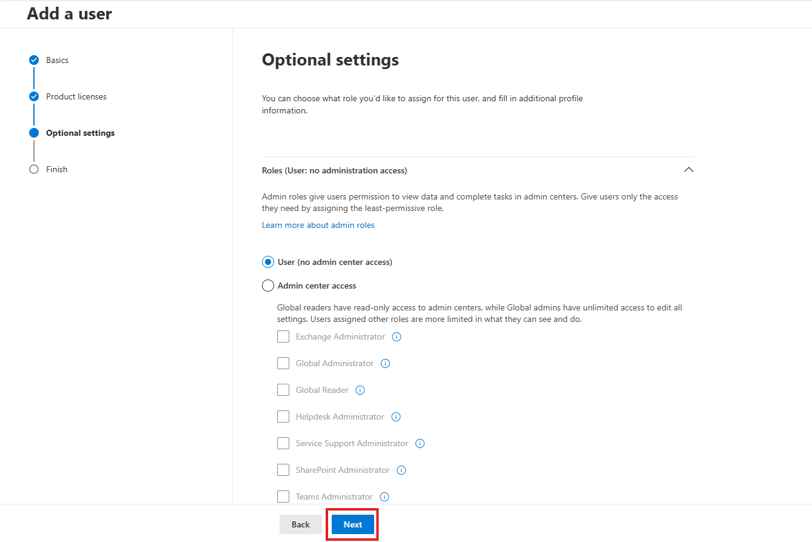

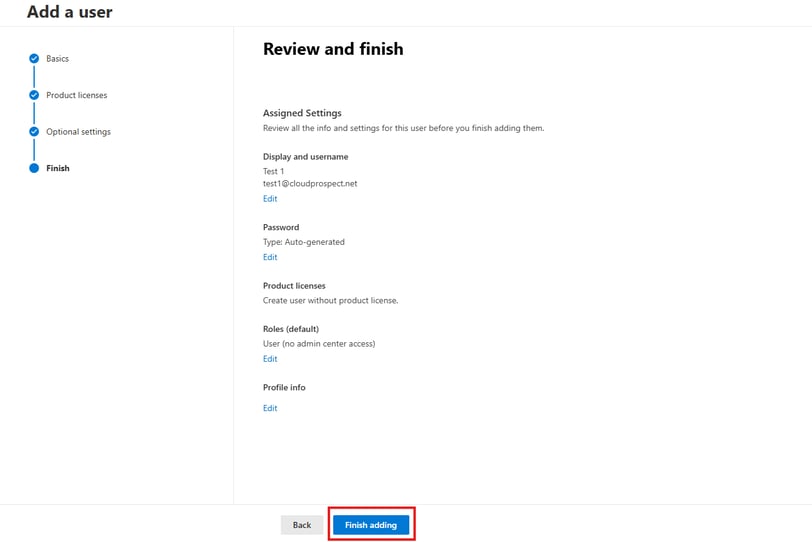
Select Next, review your new user's settings, make any changes you like, then select Finish adding, then Close
